Simulating ligament injuries through a knock-out experiment
Now that you're familiar with the normal motions of the knee, you're ready to knock out some ligaments. On page 1 of the activity worksheet, you'll find a table. There's a row for each of the motions that you practiced in the previous step and a column for each of the major ligaments of the knee plus a combination of two ligaments, the MCL and ACL. For this experiment, you'll remove each ligament(s) listed at the top of the column and then go down the rows, checking whether the motion corresponding to each row is normal or abnormal.
If you simulate abnormal motion (motion outside the normal range of motion) with the removal of a ligament, that means:
- The ligament functions to limit excess motion in that direction,
- The abnormal motion you are simulating is the same motion that can injure that ligament,
- and if the ligament is injured, the abnormal motion you are simulating could cause pain or instability in the knee.
For example, if you remove a ligament and the tibia is now able to rotate about its long axis laterally beyond its normal range, you could conclude that:
- The ligament you removed functions to limit lateral longitudinal rotation,
- Extreme lateral longitudinal rotation can injure that ligament,
- and once that ligament is injured, there could be pain and/or instability with lateral longitudinal rotation.
For this activity, an abnormal motion test for flexion-extension (e.g., beyond the normal range of extension or hyperextension of the knee) is not included just to keep the activity simpler.
How to knock out your knee's ligaments
To knock out your knee kit's collateral and cruciate ligaments, follow the general steps shown in the video or listed out below.
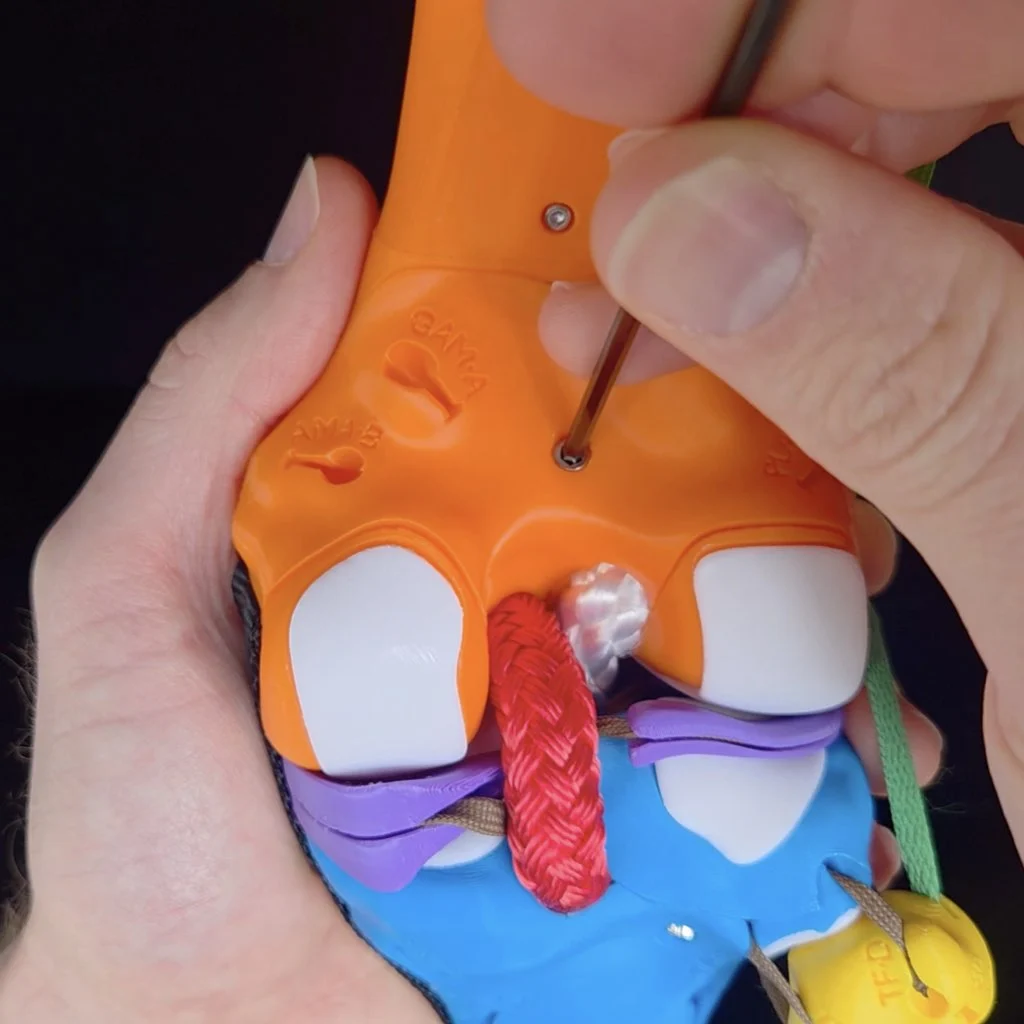
Video showing how to remove the femur access door, unclip the ACL, and replace the femur access door to perform a knock-out motion experiment.
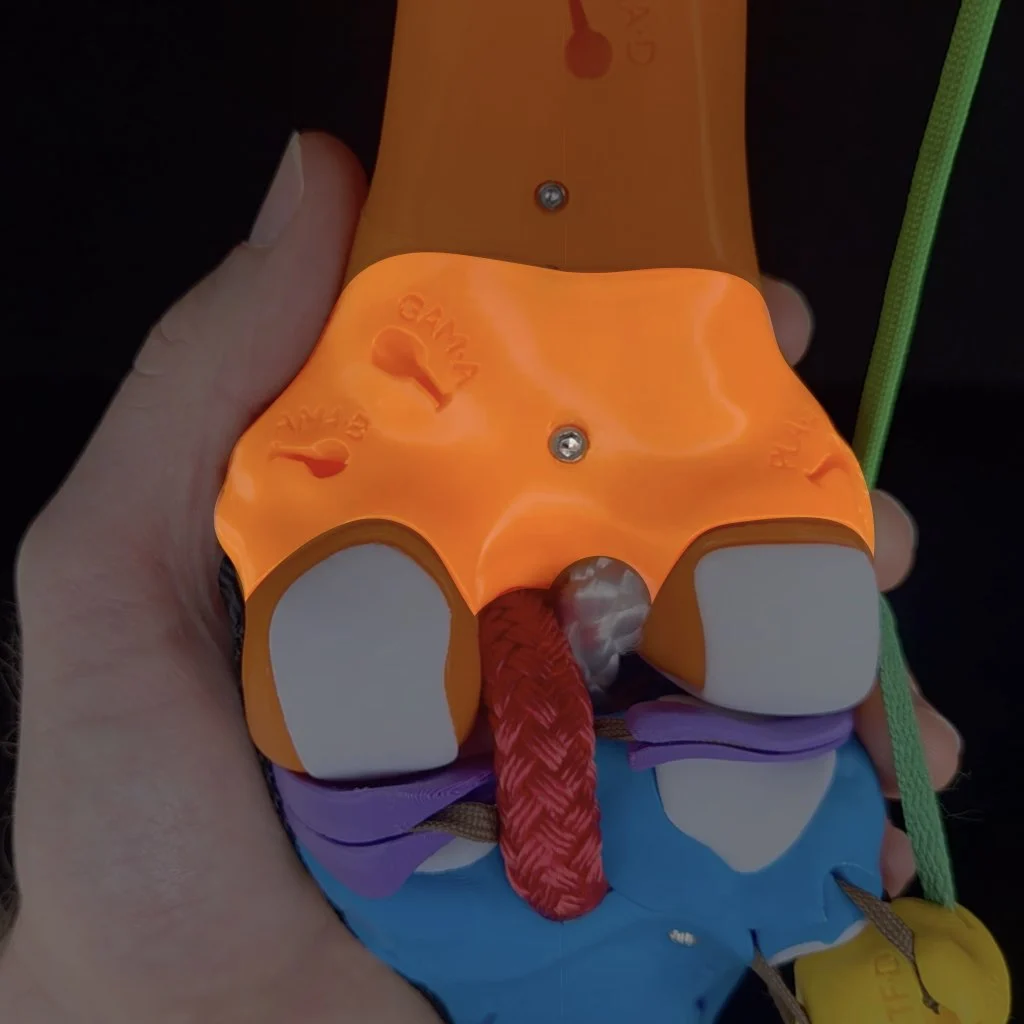
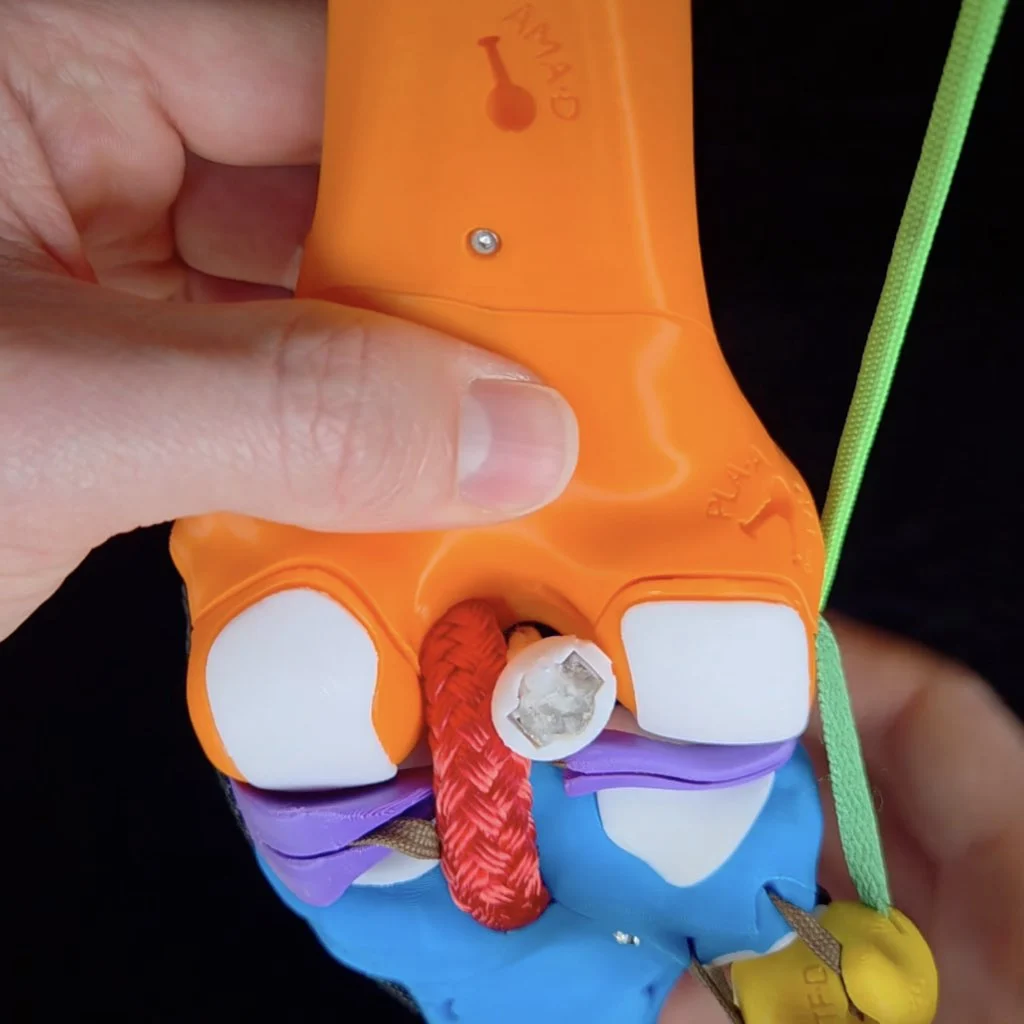
- Locate the access door on the posterior aspect of the femur.
- Use the Allen wrench to remove the screw from the access door. Place the screw in a place where it won't roll off the table or get lost.
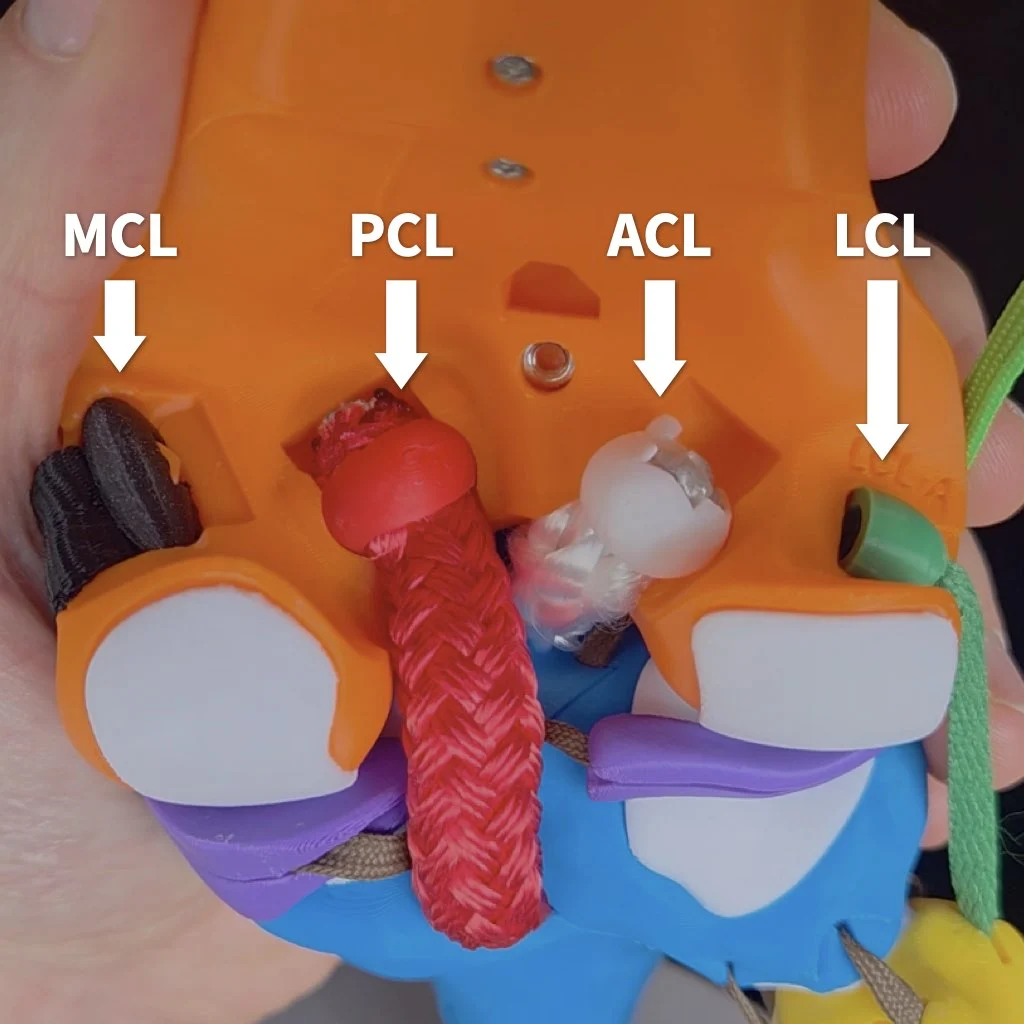
Inside, from medial to lateral, you'll see the anchoring clips for the: MCL, PCL, ACL, and LCL.
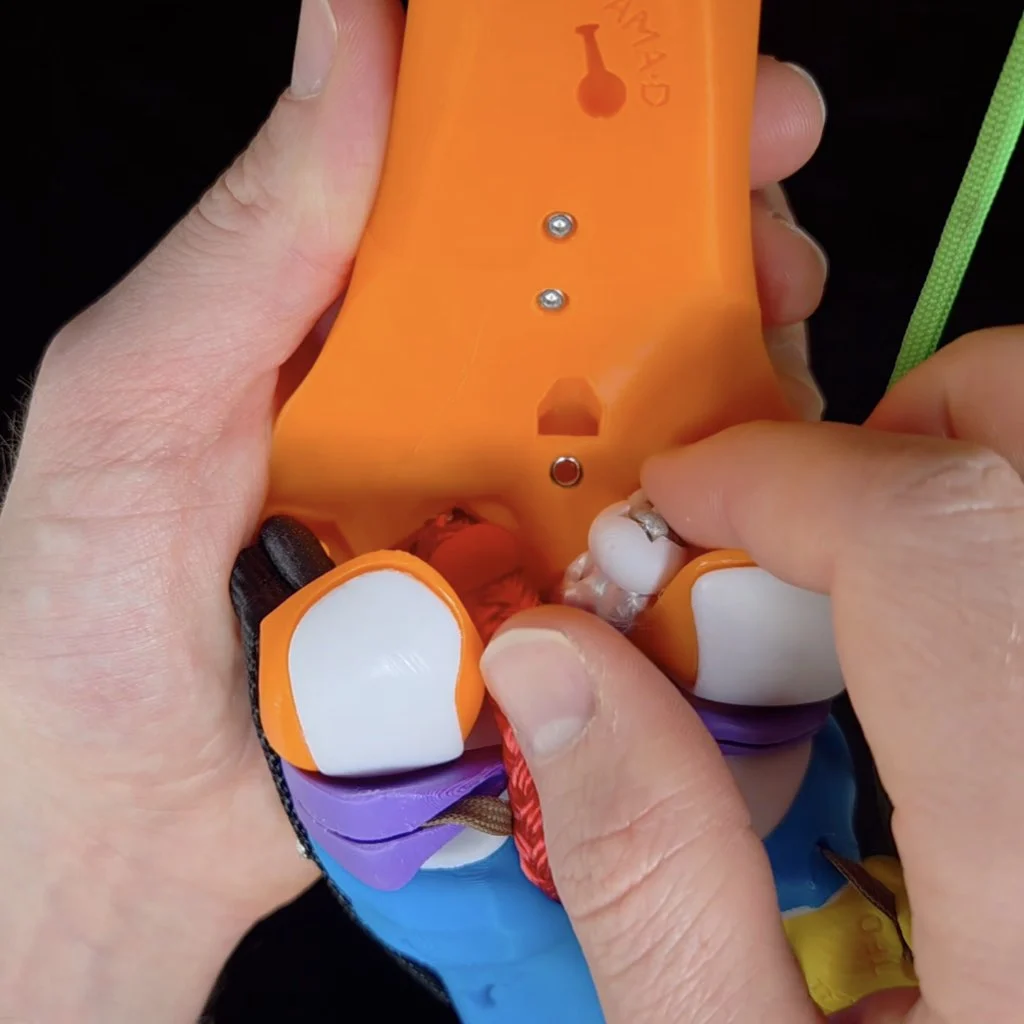
- To knock out a particular ligament, remove its clip from the socket in the femur. Note, that it's not necessarily to completely remove the ligaments from your kit, detaching them from the femur is sufficient. Tips on how to remove each particular ligament more easily will be mentioned when you get to that ligament in the guide.
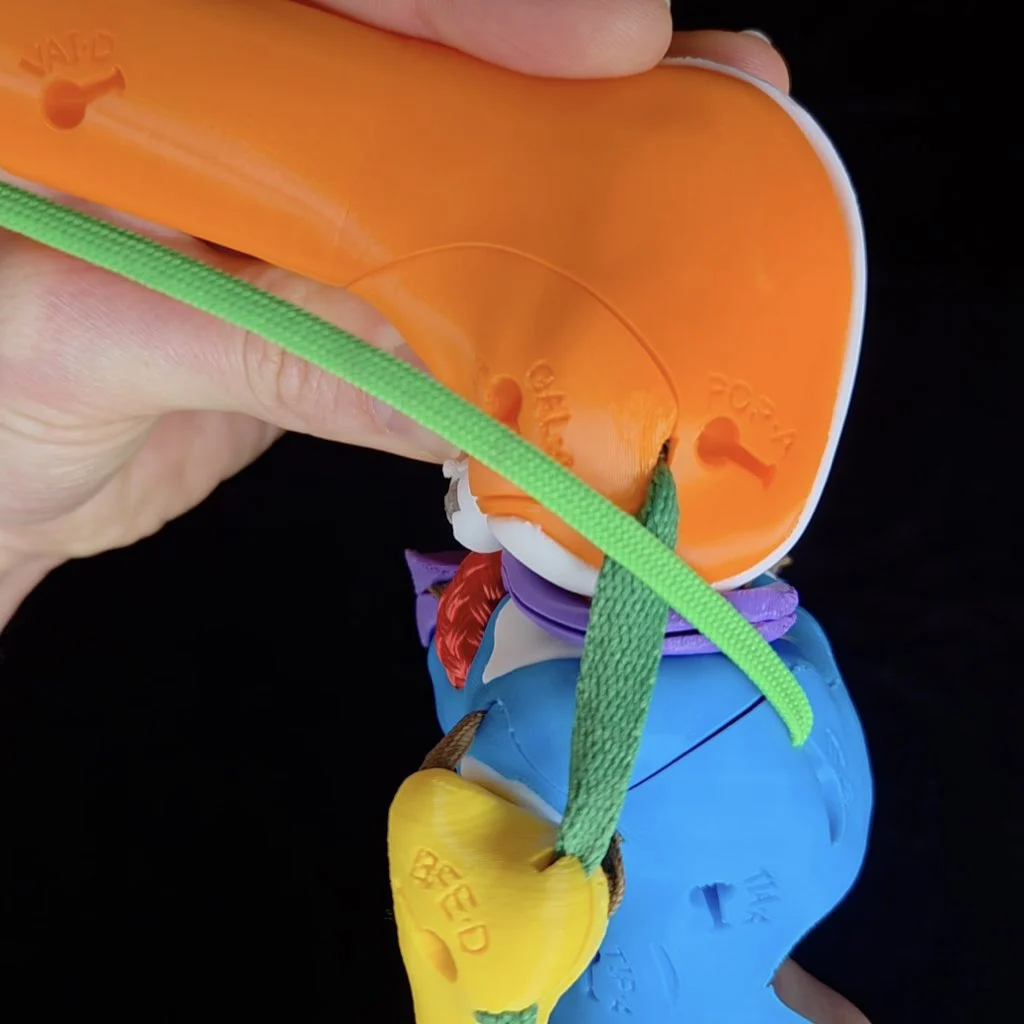
- Replace the femur access door.
- To secure the door for your experiment, simply hold the access door in place with one hand while you simulate motions with your other hand. This activity goes much faster if you don't have to screw on and off the door each time.
Knocking out the MCL
Start by knocking out the medial collateral ligament (MCL). It's easiest to remove the clip for the MCL when the knee flexed to at least 90º (extending the knee tightens the MCL, making it more difficult to unclip).
To detach the MCL, first flex the knee to around 90º to slack the collateral ligaments.
Anterior-posterior translation
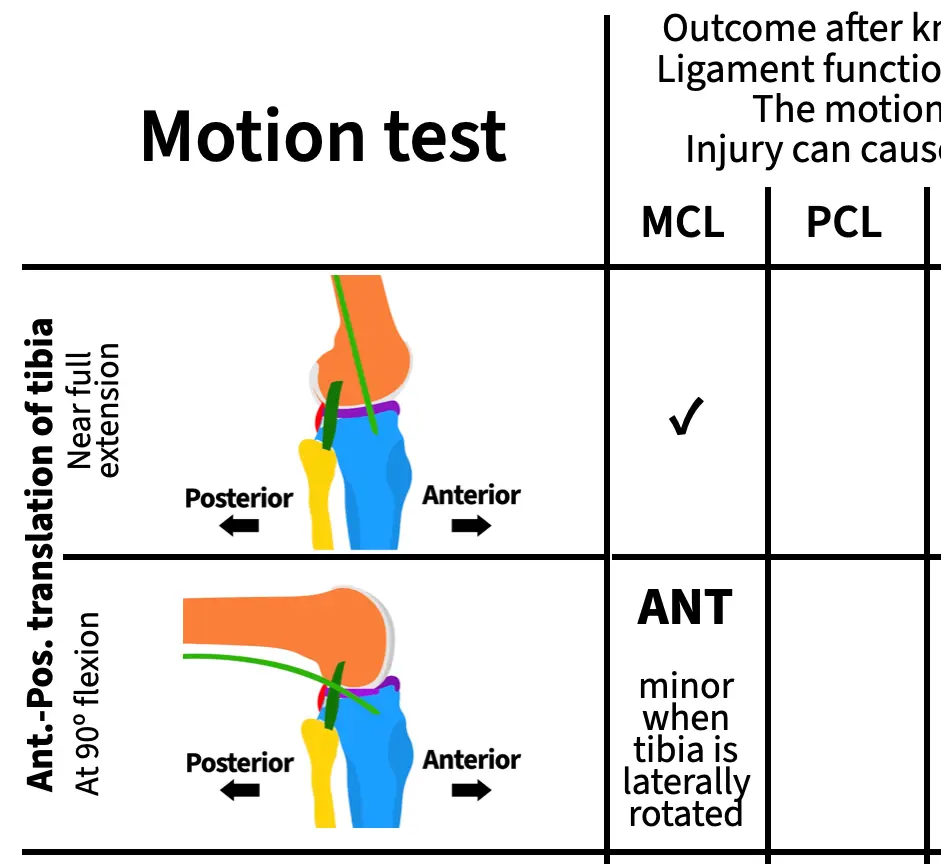
With your MCL knocked out, simulate anterior-posterior translation of the tibia at near full extension and write one of the following results in the corresponding cell of the table on page 1 of your activity worksheet. Then repeat with the knee flexed to 90º and once you're done, check your work by opening the "Assess" box below.
- ANT: The tibia translates anteriorly by more than 5 mm
- POS: The tibia translates posteriorly by more than 5 mm
- ✓: The tibia translates the normal amount along the AP translation axis
ASSESS
At both angles and with the tibia in a neutral long-axis position, the range of AP translation is normal. However, if you flex the knee to 90º and laterally rotate the tibia at the same time, you can observe excess anterior translation. For this activity, you don't need to test all possible combinations of motions for each test. So it's fine to put "✓" in both boxes. But if you want, you can write "ANT minor when the tibia is laterally rotated" for AP translation at 90º.
Remember that for each result, you can draw conclusions about the ligament's function and, if you observe abnormal motion, the motion that would injure that ligament and cause pain or instability. For example, you can draw the following conclusions about the MCL from this experiment:
- The MCL does not function on its own to limit anterior translation of the tibia when the knee is near full extension,
- the MCL functions to limit anterior translation of the tibia when the tibia is laterally rotated and the knee is flexed,
- anterior translation and lateral rotation of the tibia when the knee is flexed can damage the MCL,
- and if your MCL were damaged, you could experience pain or instability if your tibia moves anteriorly while laterally rotated during flexion.
Knock-out experiments are powerful!
Longitudinal rotation
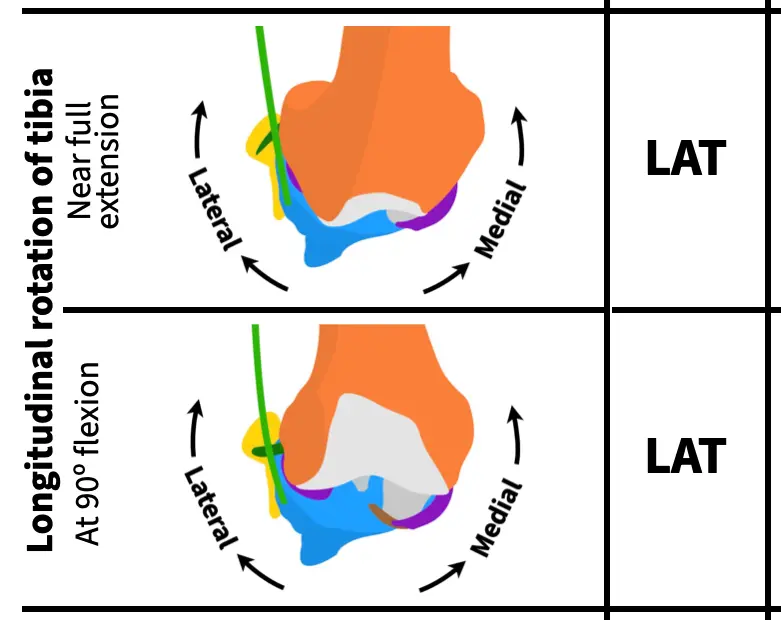
Next, rotate the tibia about its long axis at near full extension and with the knee flexed to 90º, writing one of the following results in the corresponding cells on page 1 of your activity worksheet. Once you've finished, check your work.
- LAT: Lateral rotation of the tibia causes condylar disarticulation (no cartilage at one or both points of contact)
- MED: Medial rotation of the tibia causes condylar disarticulation
- ✓: There is always cartilage on both bones at the point of contact
ASSESS
Knocking out the MCL causes excess (abnormal) lateral rotation of the tibia both near full extension and at 90º of flexion. So, you should have "LAT" in both rows for longitudinal rotation.
Varus-valgus rotation
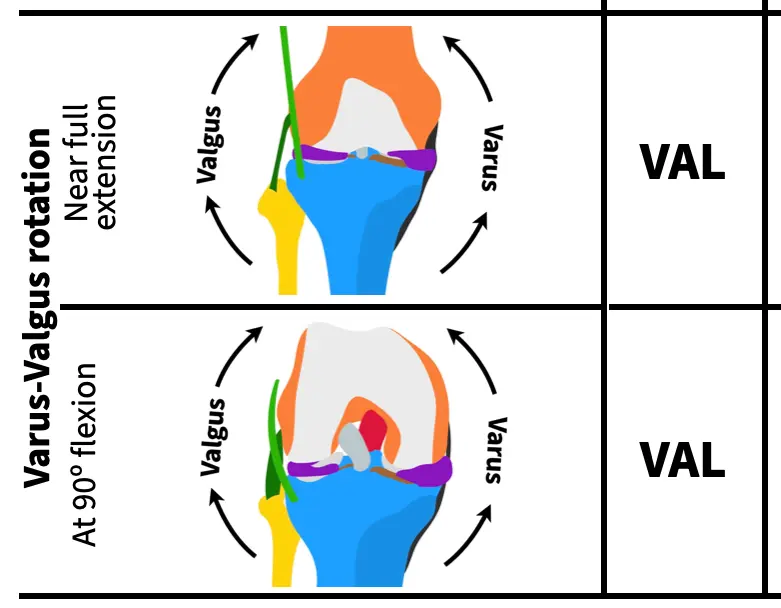
Lastly, rotate the tibia along the varus-valgus axis at near full extension and with the knee flexed to 90º, writing one of the following results in the corresponding cells on page 1 of your activity worksheet. Once you've finished, check your work.
- VAL: Valgus rotation causes lift off between the medial condyles of more than 1 mm
- VAR: Varus rotation causes lift off between the lateral condyles of more than 2 mm at near full extension or more than 10 mm at 90º of flexion
- ✓: Normal amount of lift off
ASSESS
Knocking out the MCL causes excess (abnormal) valgus rotation of the tibia both near full extension and at 90º of flexion. So, you should have "VAL" in both rows for varus-valgus rotation.
As you can see the MCL pulls a lot of weight in stabilizing the knee! By working through this ligament first with opportunities to check your work along the way, you hopefully have a good idea of how to simulate the same motions and recognize abnormal motions for the remaining ligaments. Note, that just because the MCL has many different functions doesn't mean that the other ligaments will too. For some ligaments, you'll observe just a single abnormal motion in completing your table, for others you'll find more than one.
Knocking out the PCL
Next, reattach the MCL and knock out the posterior cruciate ligament (PCL). It can be easier to remove the PCL by pushing the clip out from the anterior (front) of the knee.
It may be easier to detach the PCL by first flexing the knee and then pushing the clip out of its socket from the front (anterior) of the knee.
With your PCL knocked out, simulate all the motions to complete the next column.
You'll use the same abbreviations for each motion test as for the MCL. Here are those abbreviations again for easier reference:
Anterior-posterior translation
- ANT: The tibia translates anteriorly by more than 5 mm
- POS: The tibia translates posteriorly by more than 5 mm
- ✓: The tibia translates the normal amount along the AP translation axis
Longitudinal rotation
- LAT: Lateral rotation of the tibia causes condylar disarticulation (no cartilage at one or both points of contact)
- MED: Medial rotation of the tibia causes condylar disarticulation
- ✓: There is always cartilage on both bones at the point of contact
Varus-valgus rotation
- VAL: Valgus rotation causes lift off between the medial condyles of more than 1 mm
- VAR: Varus rotation causes lift off between the lateral condyles of more than 2 mm at near full extension or more than 10 mm at 90º of flexion
- ✓: Normal amount of lift off
Knocking out the ACL
Next, reattach the PCL and knock out the anterior cruciate ligament (ACL) as shown in the video at the top of this page. Finding the excess motions that result from an ACL knock out is a bit trickier than for the other ligaments because of an interaction with the menisci. Do the anterior-posterior translation test closer to near full extension (about 180º rather than 160º) and with a bit more force than for the other ligaments.
With your ACL knocked out, simulate all the motions to complete the next column.
Knocking out the LCL
Next, reattach the ACL and knock out the lateral cruciate ligament (LCL). Like the MCL, it's easiest to remove the clip for the LCL when the knee flexed to at least 90º (extending the knee also tightens the LCL, making it more difficult to unclip).
Like for the MCL, first flex the knee to around 90º to slack the collateral ligaments to remove the LCL.
With your LCL knocked out, simulate all the motions to complete the next column.
Knocking out the IT tract/band
Next, reattach the LCL and knock out the iliotibial (IT) tract/band. To detach the IT tract, simply unhook it from its attachment on the cross-section plate.plate.
Video showing how to detach the IT band from the superior cross-section plate.
With your IT band knocked out, simulate all the motions to complete the next column.
Knocking out the MCL and ACL
For your last knock-out test, you'll knock out two ligaments at the same time. Reattach the IT tract and knock out both the MCL and the ACL.
With your MCL and ACL band knocked out, simulate all the motions to complete the next column. Make a note if any of the excess motions that you observe are greater than when the MCL or ACL is knocked out on its own—indicate this in your table by writing "greater" along with the direction of excess motion.
Reattaching all of the ligaments and the femur access door
Once you've finished running all of your simulations, reattach all of the ligaments and the femur access door using the screw and Allen wrench to secure it into place.