
Station setup
To setup this activity as a station you'll need:
- The printed station instructions for this activity.
- A printed station worksheet for each student or group (students can also access a digital PDF of worksheet via a QR code on the instructions).
- A Human Knee Active Learning Kit (Basic or Full model). To prepare the model for the station you'll need to:
- Attach the elastic muscle cords for the rectus femoris (REF) and the vastus intermedius (VAI).
- Attach four manual muscle cords for the vastus medialis (VAM), vastus lateralis (VAL), semimembranosus (SEM), and the biceps femoris (BFE). It doesn't matter which color you use for which muscle—the instructions don't refer to the muscles by color.
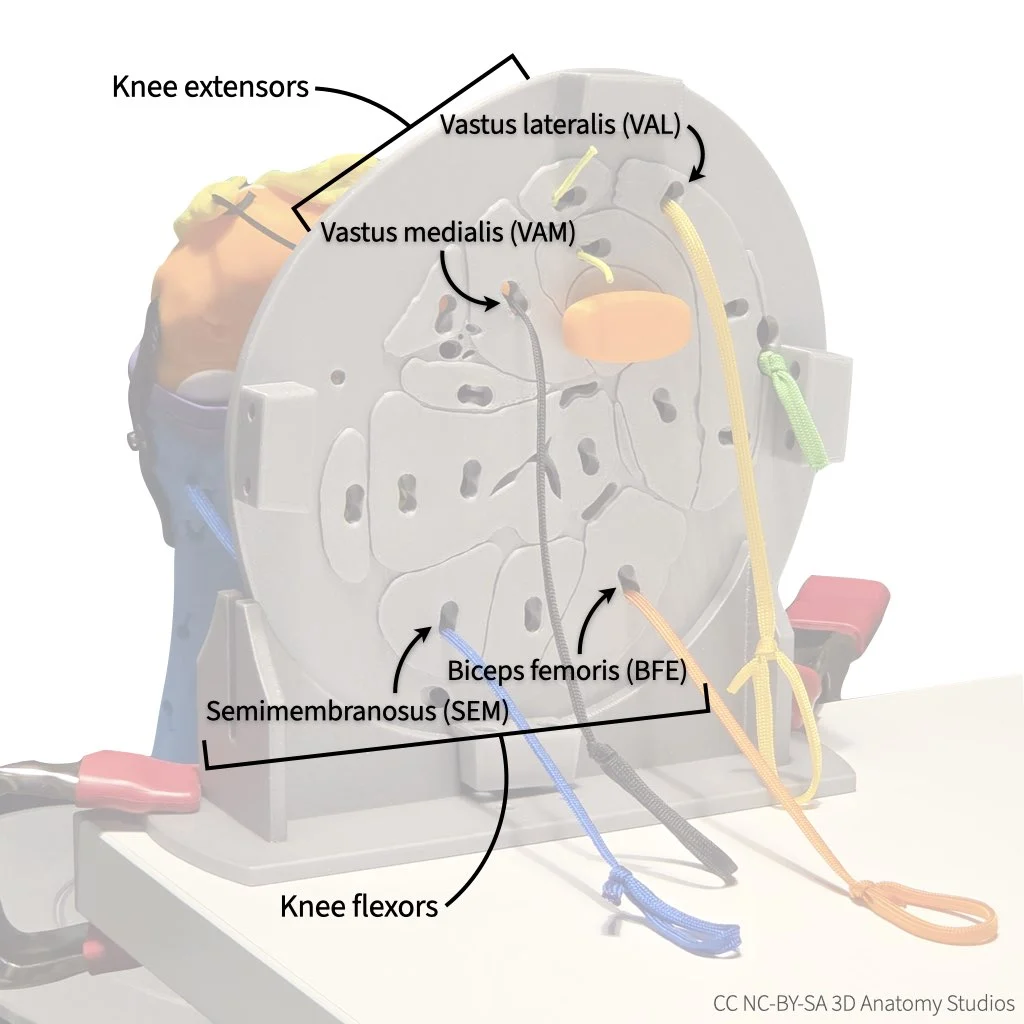
Once you have all of the muscle cords (elastic and manual) attached, the superior side of the superior cross-section plate should look like this (for the manual muscle cords, it doesn't matter which color you use for which muscle).
- Secure the knee kit to a tabletop using the bracket and some clamps.
Once you've attached all of the muscle cords and secured the knee kit to a tabletop, your knee kit should look something like this:
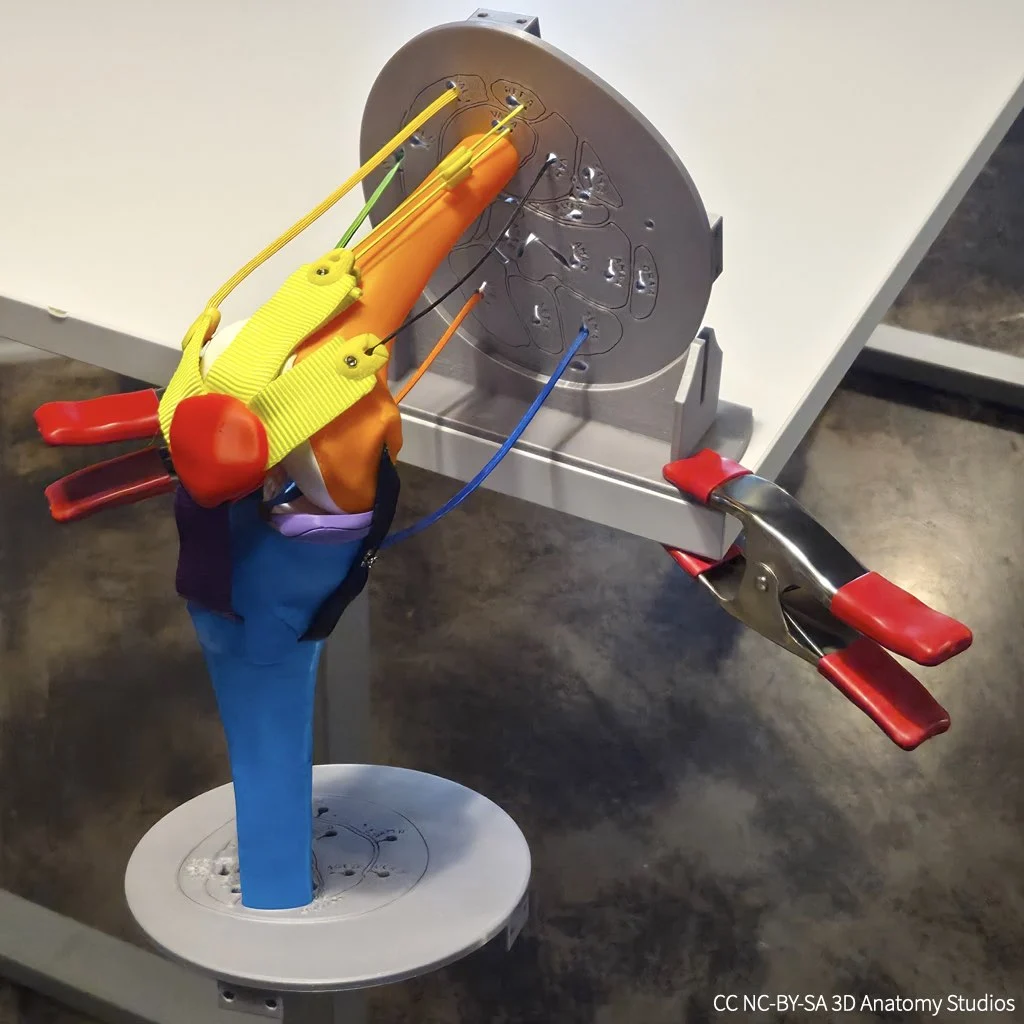
It's best to position the knee kit near the corner of the table top so that the tibia can hang over the side and so that students can easily access and pull the manual muscle cords on the other side of the superior cross-section plate.
No comments to display
No comments to display