Detaching the elastic muscle cords
To detach the muscles from your knee kit, you just need to know how to detach the cord ends from one of the three possible attachment site types: a quadriceps tendon clip, an attachment site/hole on the surface of a bone, and an attachment site/hole in a cross-section plate. The instructions below are the same whether the muscle end you're attaching is of the thinner, elastic cord type or the thicker, inelastic cord type.
Materials needed
To detach most of the muscles, you'll need the forceps, located at the bottom left corner of parts plate A.
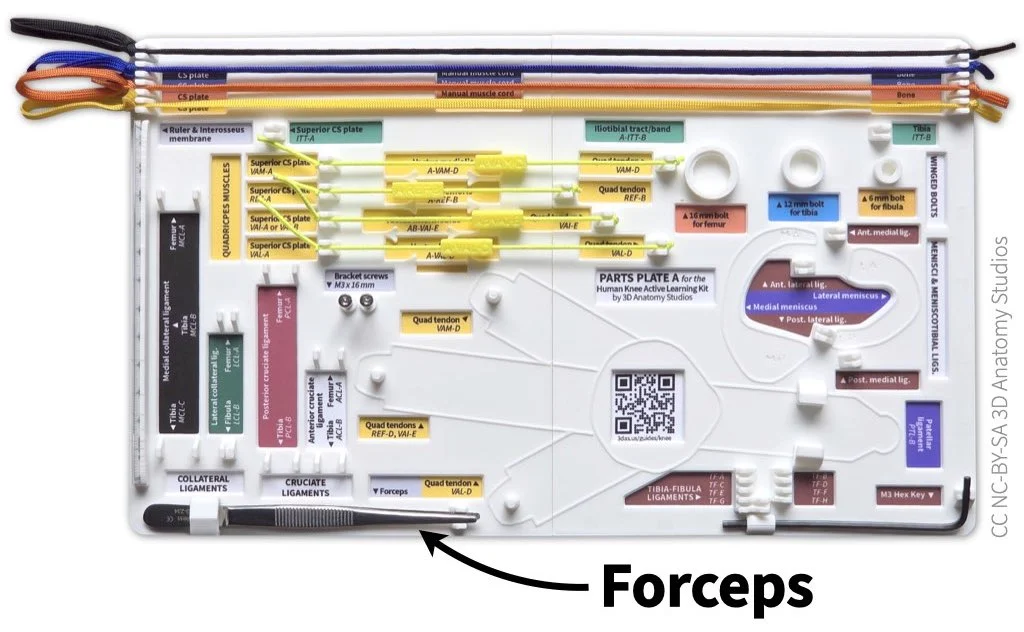
The forceps should be attached to the bottom left corner of parts plate A in your kit.
Before you detach any muscles, be sure that you understand the muscle color and labeling scheme used in your kit. This will help you easily identify each muscle and its corresponding compartment to know where to "dock" the muscle on the parts plates.
Detaching a muscle from a quadriceps tendon clip
The quadriceps tendon clips are the yellow plastic clips at the ends of each of the quadriceps tendons (wide yellow straps).
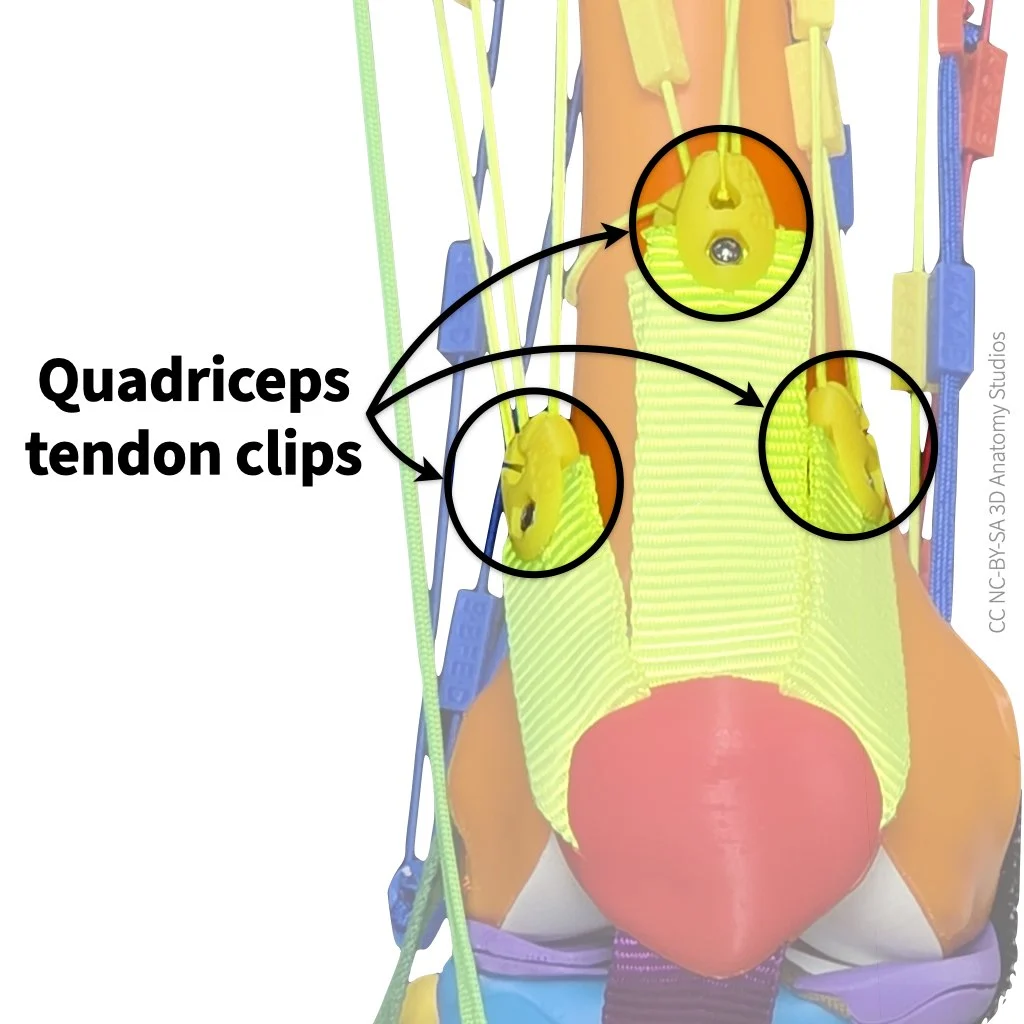
The quadriceps tendon clips (the yellow plastic pieces indicated by circles) connect the quadriceps elastic muscle cords to the quadriceps tendons (yellow straps).
If you're detaching a muscle from a quadriceps clip that is also attached to a cross-section plate, detach it from the cross-section plate first. To detach a muscle from a quadriceps clip, pull the cord out of the slit to unlock the knot and then up, as shown in the video below.
Video showing how to detach an elastic muscle from a quadriceps tendon clip.
Detaching a muscle from a bone
The second attachment type is the surface of a bone. These are the keyhole-shaped holes (with accompanying labels) that you see all over the surface of the bones of your kit.
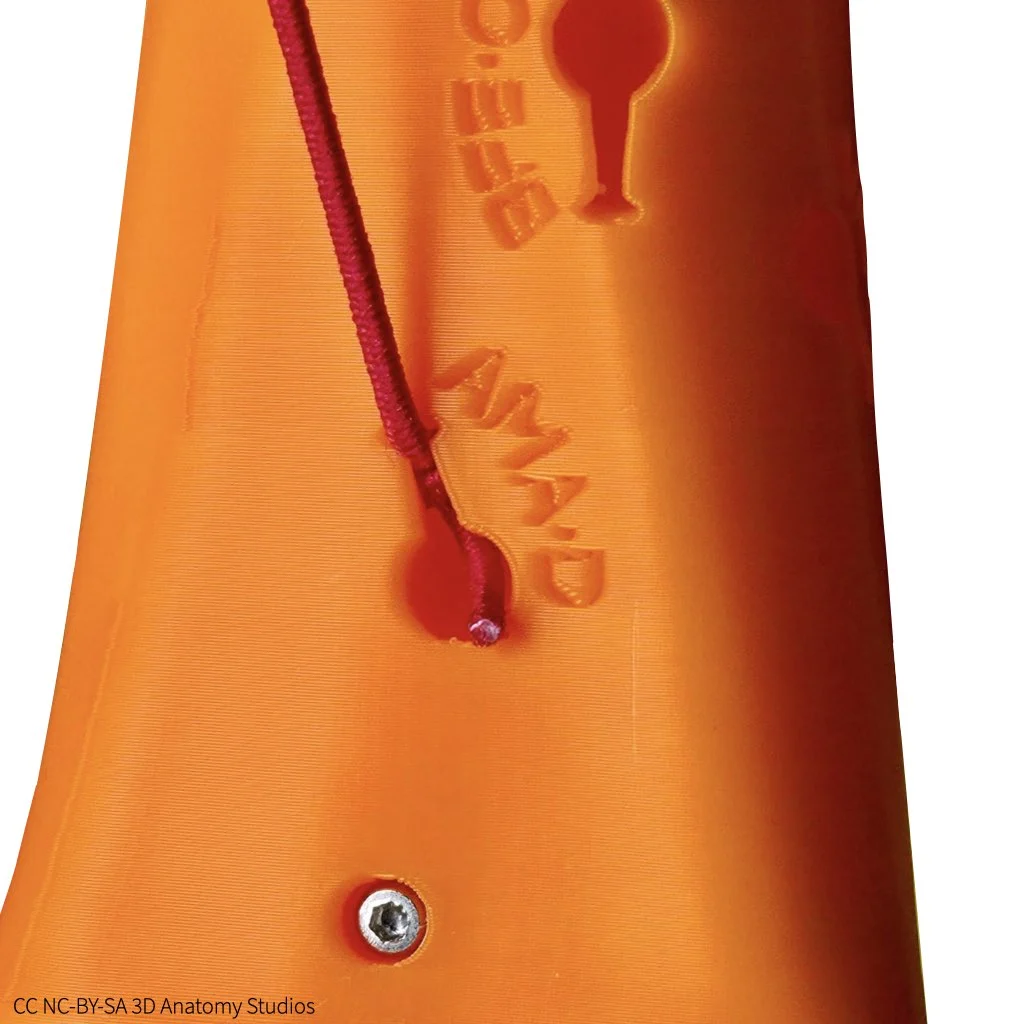
An example of an elastic muscle cord (adductor magnus, "AMA", red) attached to a bone (orange) and the attachment site label ("AMA-D").
Inside each of these keyholes is a hook that catches the knot of a cord. So when you detach a muscle, you're essentially unhooking it. If you're detaching a muscle from a bone that is also attached to a cross-section plate, detach it from the cross-section plate first. To detach an elastic cord from a bone surface attachment, pull the cord with your hand out of the keyhole slit to unhook the knot and then continue pulling the knot and cord out of the hole, as shown in the video below.
Video showing how to detach an elastic muscle from the surface of a bone using your hands.
If for some reason you're having trouble detaching the cord in this way, you can also use the forceps. Pull on the tail of the cord (the bit of cord after the knot) to unhook the knot and then pull the knot and cord out of the hole, as shown in the video below.
Video showing how to detach an elastic muscle from the surface of a bone using forceps.
Detaching a muscle from a cross-section plate
The third and last attachment type is a cross-section plate (either the superior or inferior one). The cross-section plates have the same keyhole-shaped holes as the surface of the bones, each located within the indentation of the corresponding muscle.
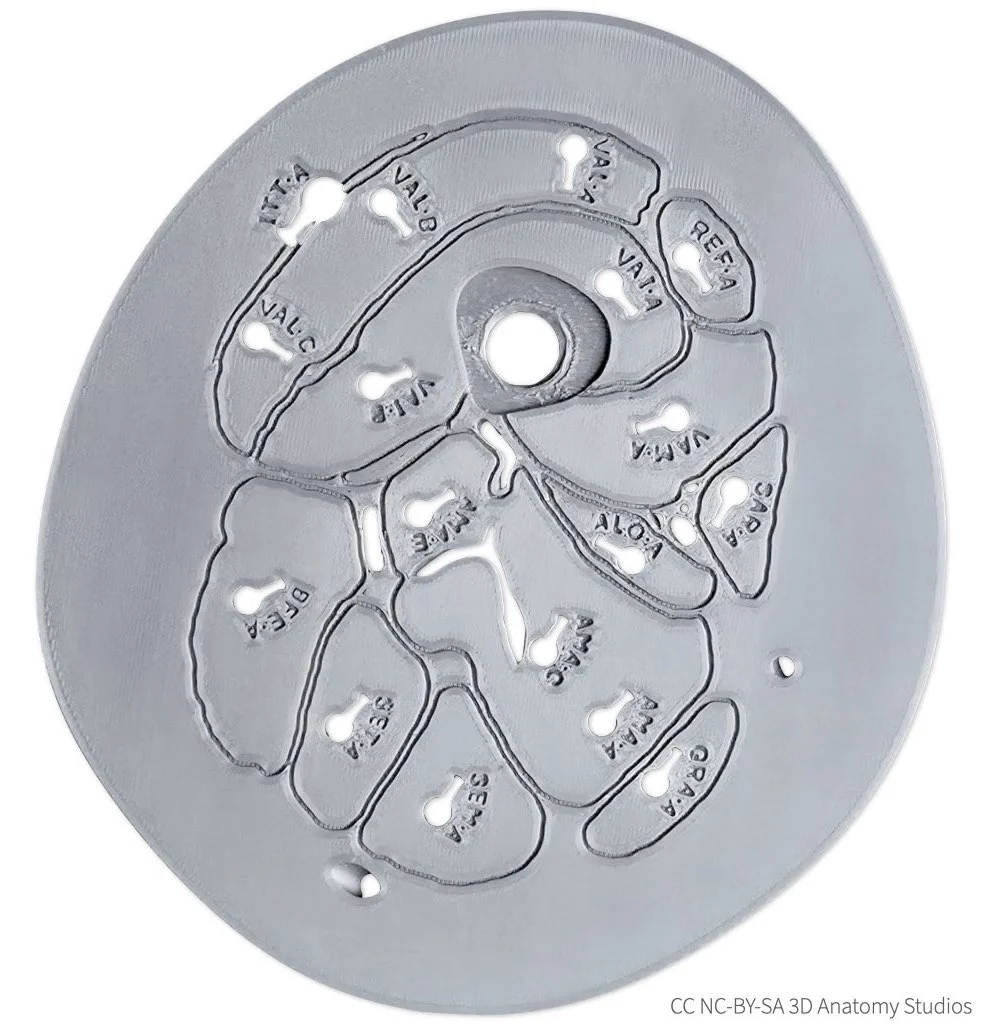
The superior cross-section plate from your kit, as seen from an inferior view (looking up from the knee). The keyhole-shaped holes and labels are muscle attachment sites.
Detaching a muscle from a cross-section plate is easier than detaching it from the other two attachment types. For this reason, whenever you're detaching a muscle, detach it from the cross-section plate first. To detach a muscle from a cross-section plate, pull the tail of the cord up on the external (unlabeled) side of the plate to unhook the knot and then thread the cord through the hole, as shown in the video below.
Video showing how to detach an elastic muscle from a cross-section plate. Unhook the knot first from the external (unlabeled) side of the plate and then thread the cord out through the hole.
Attaching a muscle to the parts plate
Once you've detached a muscle, you can "dock" it on one of the parts plates. The parts plates that come with your kit (one if you have a basic knee model, three if you have a full knee model), have a designated storage spot for every muscle in your kit, grouped and color-coded by compartment. This will help you keep all of the muscles organized if you remove them from your kit and more easily find a particular muscle when you want to reattach it.
Muscle groups by parts plate |
|
|---|---|
Parts plate A |
Four quadriceps muscles (the muscles included in both the basic and full knee kit models) |
Parts plate B |
All remaining muscles of the thigh |
Parts plate C |
All muscles of the leg |
Each storage spot has the name of the muscle, the abbreviation printed into the detachable muscle clip, the attachment site for each end of the muscle.
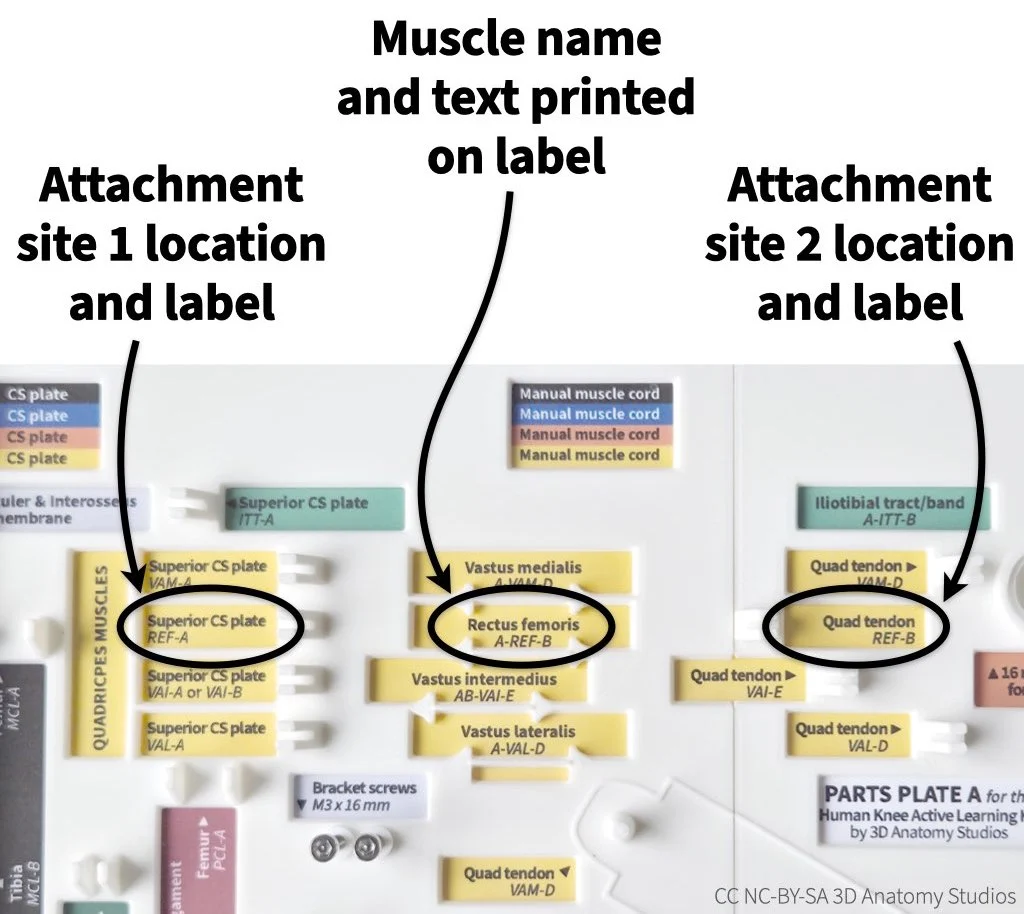
The storage spot for each muscle on the parts plate has the muscle name, attachment site locations and labels, and the text printed on the muscle's clip-on label.
To attach the muscle to its storage spot, slide the cord into the hook grooves at either end of the storage spot, so that the knots are secured into the hooks, as shown in the video below.
Video showing how to attach a muscle to the parts plate.
Each storage spot also has a muscle label holder onto which you can clip the muscle label if you remove it from the muscle.
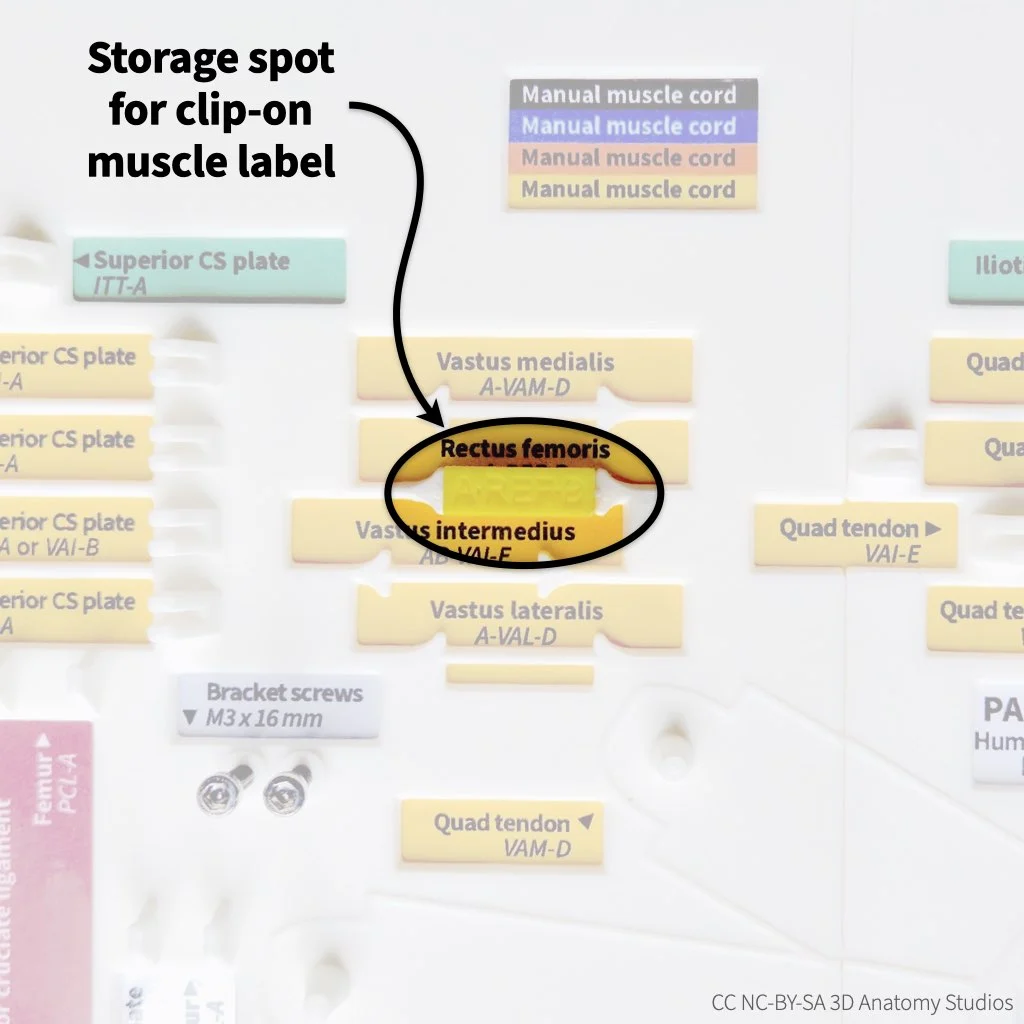
An example storage spot for a clip-on muscle label on parts plate A. These storage spots are short ridges where the muscle labels can be clipped when they are not attached to a muscle.
No comments to display
No comments to display