Activity Guide
A full guide to this activity that students can follow for self-guided learning or that you can use to prepare a demonstration or set up a lab station
- Activity Worksheet (Self-guided)
- Introduction
- Materials needed
- Pre-marking structures on your kit (Optional)
- General guide to this scavenger hunt
- The Scavenger Hunt
- Finish labeling your kit (Optional)
- References cited
Activity Worksheet (Self-guided)
Use the worksheet below for the self-guided activity. If you are setting this activity up as a station, use this worksheet instead.
Introduction
Before you start exploring the function of your knee in other activities (e.g., how the knee moves, what each of the ligaments do), you’ll need some familiarity with its structure (i.e., its form). This activity will introduce you to the knee’s major connective tissues.
The following connective tissue types are included in this activity:
- Bones and their associated landmarks
- Cartilages
- Ligaments
- Tendons
Your challenge for this activity is to find various connective tissue structures of the knee given only hints about their size, shape, and position relative to other structures.
To learn anatomical structures, your first thought might be to just memorize them. This can work in the short term. But it’s boring, time-consuming, and you will quickly forget most of what you memorized. A better way to learn structures is to interact with them (e.g., find them, write about them, compare them, make them move, measure them, etc.). This is more efficient (i.e., you’ll learn more in less time) and you'll remember more long-term. Resist the temptation to use an anatomy atlas! The more you struggle with finding the structures, the more you'll learn (and remember). You can always use a reference diagram after you’ve finished to check your work.
Materials needed
For this activity you’ll need:
- The worksheet for this activity (either opened in a PDF viewer on a desktop/tablet computer or printed out).

- A Human Knee Active Learning Kit (Basic or Full model). You'll need at least the minimal number of muscles attached (left in the image below).
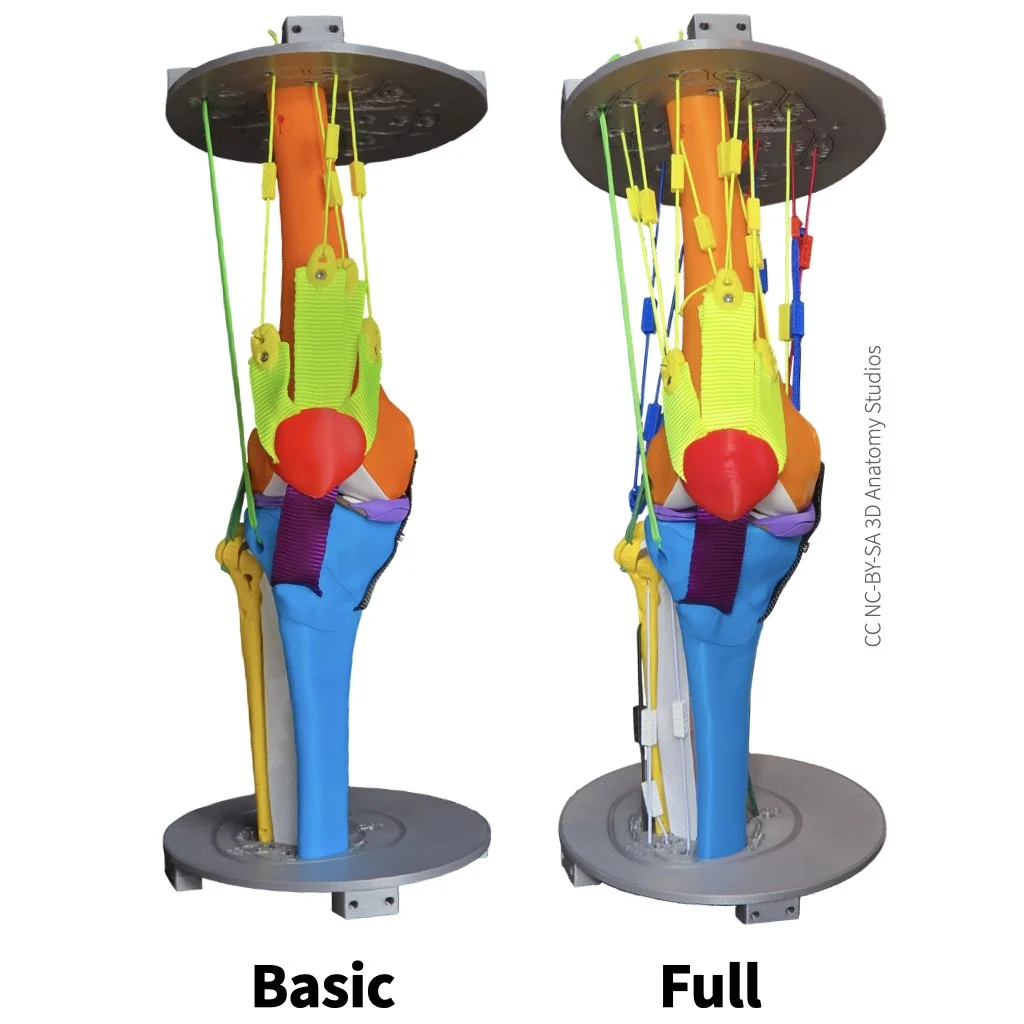
For this activity, you'll need a knee kit resembling one of the two images above. Your knee can have just a few muscles attached (left), all of the muscles attached (right), or some number in between.
This activity is easier with the minimal muscle set but it’s also possible to do with more muscles attached. Your knee kit may or may not already have stickers attached. If your knee kit doesn’t look like one of the kits in the image above, follow these instructions for assembling or disassembling your kit.
The following are optional materials for this activity:
- One of the sheets of white circle stickers in your kit
- A ball point pen or mechanical pencil for writing on the stickers (rollerball or gel pens can smear on the stickers)
Pre-marking structures on your kit (Optional)
If your knee kit doesn’t already have stickers attached, you can start by marking all of the hunt items on your knee kit with blank stickers.
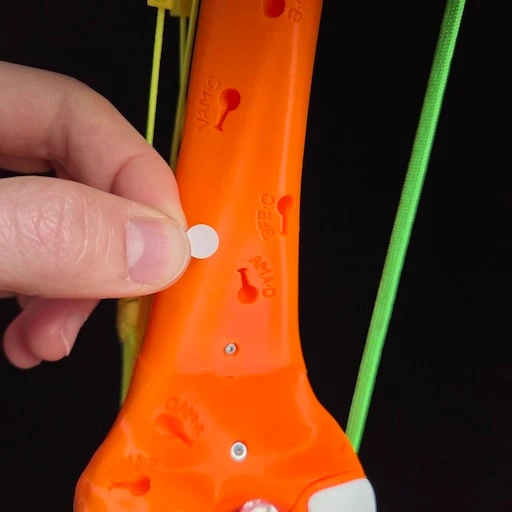
Attaching stickers to your knee kit
This will help you gain familiarity with the shapes and locations of the structures before you actually start learning their names. You’ll also have the option at the end of the activity to write labels on each of the stickers.
To attach the stickers, refer to pages 2-4 of the activity worksheet.
Starting with structure "A" at the top of page 2, attach stickers onto your knee kit where indicated by each arrow. You can skip structures that are too difficult to attach a sticker to. You only need to attach one sticker for each labeled structure; since the arrows go alphabetically, you’ll be able to tell if you reach a structure for which you’ve already added a sticker.
General guide to this scavenger hunt
To complete this scavenger hunt, use the hints in this guide and the wordbank on page 1 of the activity worksheet to fill in the blanks on pages 2-4 of the worksheet. Follow the hints in order- each hint builds off a previous one. Use the images on your worksheet together with your physical knee kit; combining the 2D images with the 3D model will help you recognize each structure from multiple views.
Structure names and letters
There are 43 structure names but more than 43 blanks - you’ll use some of the names more than once to help you recognize structures from different views. Each structure has a unique letter associated with it; these letters are included with the blanks on pages 2-4. If two blanks have the same letter (on different pages), that means it’s the same structure. This is useful for checking your work afterward but try to avoid using this to help you as you fill in each blank. The more you use the hints in this guide to fill in the blanks, the better you’ll remember the structures later.
Anatomical language
The hints make extensive use of anatomical directional terms (e.g., superior, inferior, anterior, etc.) to help you build fluency with this language and anatomical reasoning; use the diagram on page 1 of the worksheet to help you.
The Scavenger Hunt
Your hunt starts with the easy stuff: the four bones of the knee.
The bones
Femur: This is the most superior of the bones with two condyles (rounded protuberances) at its inferior (distal) end.
Write in "Femur" on the worksheet on the corresponding blank(s) (we won't keep repeating this instruction for each hint).
Tibia: The tibia is the bone that articulates with the femur at its two previously mentioned condyles.
Fibula: This bone articulates with the tibia at its (both the tibia's and the fibula's) superior end.
Patella: This is a sesamoid bone (a bone that forms within a tendon) anterior to the femur, tibia, and fibula.
The bony landmarks
Bony landmarks (named structures on bones) are important for describing injuries to bones, specifying locations for surgical interventions, comparing the size and/or shape of the same bone between two individuals, etc.
Shaft (of the femur): This is the (approximately) cylindrical portion of the femur.
Lateral condyle (of the femur): In anatomy, "condyle" refers to a part of a bone that forms an articulation (joint) with another bone. The lateral condyle is the lateral part of the femur that forms the joint with the tibia. How do you know which is lateral and which is medial? Try to figure this out on your own but if you're stuck check out the hint below.
HINT
Being able to recognize the medial versus lateral aspect of the knee will come in handy again and again with these activities. It will help you quickly identify muscles, ligaments, and other structures. Without the pelvis or foot to help you, it's surprisingly easy to get turned around. Here, your best friend is the fibula. The fibula is more lateral than the tibia.
Left or right knee: Now that you're oriented to which side is lateral and which side is medial, determine whether your knee kit is a left or a right knee.
HINT
In anatomy, your body is always available as a helpful reference. If you’re not sure which side your knee kit is, try holding it up to your own knee to help you.
Medial condyle (of the femur): You've already identified the femur's lateral condyle- this is the other (more medial) one.
Intercondylar fossa: Try finding this bony landmark on the posterior aspect of the femur by interpreting the meaning of the name in Latin.
HINT
"Inter-" in Latin means "between" or "among" and "fossa" means "ditch," "trench," or "channel."
Lateral condyle (of the tibia): It takes (at least) two bones to make a joint so just as the femur has condyles at the femorotibial joint, so does the tibia. This is the lateral of the two condyles at this joint.
Medial condyle (of the tibia): The tibial counterpart to the medial condyle of the femur.
Lateral epicondyle: In Latin, "epi-" means above, so this bony landmark of the femur is above (superior to) the femur's lateral condyle. Look for a small protuberance (bump).
Medial epicondyle: The medial counterpart to the lateral epicondyle, also on the femur.
MORE DETAIL
Bones are living, dynamic tissues that respond to the other tissues around them. Ligaments and tendons attached to bones pull on the bone at their attachment. Over time, this localized pulling force literally pulls up the surface of the bone, modeling it like clay and forming a landmark (e.g., bump, ridge, etc.). The epicondyles of the femur are examples of this type of landmark and are formed because of muscles and ligaments that attach to the femur at those sites.
Adductor tubercle: A bump ("tubercle" comes from the Latin for "small swelling") on the femur formed by the tendon of the vertical/hamstring portion of the adductor magnus muscle. You'll find this bump superior to one of the femoral condyles.
HINT
If you're unsure whether the adductor tubercle is superior to the medial or lateral condyle of the femur, note that adductor muscles pull body parts closer to the central axis of the body (as opposed to abductor muscles, which pull them away from the central axis). Knowing this, which makes more sense: medial or lateral?
Lateral supracondylar line: A ridge on the posterior aspect of the femur, superior to ("supra-") the lateral condyle of the femur. This ridge is formed by the tendon sheets of the biceps femoris and vastus lateralis.
Medial supracondylar line: The medial counterpart to the lateral supracondylar line. This ridge is formed by the tendon sheets of the vastus medialis and adductor longus.
Popliteal surface: The area between the medial and lateral supracondylar lines ("popliteal" comes from the Latin for the knee region).
Linea aspera: Find this ridge (linea aspera means "rough line" in Latin) by tracing where the medial and lateral supracondylar lines come together superiorly. This ridge is formed by the tendon sheets of various hamstring and adductor muscles.
Lateral intercondylar tubercle: This is the lateral ridge between ("inter-") the condyles of the tibia at the femorotibial joint.
HINT
To see this landmark well, expose the femorotibial joint by dislocating the patella laterally and fully flexing the knee (see page 3 of the worksheet).
Medial intercondylar tubercle: The medial counterpart to the lateral intercondylar tubercle.
Intercondylar eminence: This is the raised portion of the tibia between the two condyles, formed by the two intercondylar tubercles.
Tibial tuberosity: Large bump on the anterior aspect of the tibia, formed by tension from the ligament that attaches the patella to the tibia.
Anterior border of the tibia: Follow the tibial tuberosity inferiorly to find this sharp ridge running the remaining length of the tibia.
MORE DETAIL
If you were to cut the tibia in half and look at the cross section, it would look roughly like a triangle. The "corners" of this triangle are referred to as "borders" and run superoinferiorly along the length of the tibia. The borders of the tibia are: anterior, medial, and interosseus; only the anterior border is included in this activity.
Anterior border of the fibula: The fibular counterpart to the anterior border of the tibia. The fibula also has interosseus and posterior borders (not included in this activity).
Soleal line: Ridge on the posterior aspect of the tibia formed by the soleus muscle. This ridge arches from lateral to medial as you trace it from superior to inferior.
Interosseus membrane: "Osseus" comes from the Latin for "bone" and you should already recognize "inter-" from a previous structure.
Neck, head and apex of the fibula: The terms "head" and "neck" are used for multiple long bones of the body (e.g., humerus, femur) to refer to the superior-most structures of these bones. Just as for the head and neck of the body, the head is superior to the neck. For the fibula, the superiormost point of the bone is the apex. There are separate blanks on the worksheet for each of these.
The cartilages
Bone is an excellent tissue for bearing forces and torques (twisting forces) but it is not good at withstanding the wear and abrasion that occurs at surface contacts between moving bones. That's why the contact points between moving bones (i.e., at joints) are always with lined with cartilage (well, healthy joints, at least).
Articular surface: "Articular" in anatomy refers to anything joint-related (e.g., articulation, articulates with). The articular surface is made up of articular cartilage.
Lateral meniscus: Crescent- or C-shaped cartilage between the lateral condyles of the femur and tibia (meniscus means "little crescent/moon" in Latin).
Medial meniscus: Like the lateral meniscus but medial.
MODEL NOTE
The menisci (plural of meniscus) are composed of a soft, pliable cartilage but are represented in your kit by a harder plastic because most pliable materials would prevent smooth motion between the menisci and bones without some kind of lubrication.
The ligaments
Ligaments connect bone to bone or cartilage to bone. These are represented in your knee kit by ropes or straps that stretch minimally when pulled on.
Meniscotibial/Coronary ligaments: The ligaments that connect the horns of each meniscus (the end points of each crescent) to the tibia.
MORE DETAIL
"Coronary" comes from the Latin for "crown" or "wreath"; that's one name for these ligaments because, together with the menisci, they form a crown around the superior margin of the tibial plateau (the flat "top" of the tibia). There are four of them, named based on lateral vs. medial and anterior vs. posterior:
Lateral anterior meniscotibial ligament
Lateral posterior meniscotibial ligament
Medial anterior meniscotibial ligament
Medial posterior meniscotibial ligament
There are several other ligaments that connect the menisci to the medial collateral ligament, the tendinous sheath surrounding the patella, the tendon of the semimembranosus muscle, the popliteus muscle, the femur, and to each other (Smith et al. 1996); these are not included in this activity or in your kit because they would make the kit difficult to assemble and disassemble.
Anterior cruciate ligament (ACL): Of the four ligaments that connect the femur and tibia, this one has the most anterior attachment on the tibial plateau (specifically the intercondylar eminence).
Posterior cruciate ligament (PCL): The ligament connecting the femur and tibia with the most posterior attachment on the tibia.
Lateral collateral ligament (LCL): The lateralmost ligament connecting the femur and tibia. Also known as the fibular collateral ligament.
Medial collateral ligament (MCL): The medialmost ligament connecting the femur and tibia. Also known as the tibial collateral ligament.
Patellar ligament: Connects the patella and tibia.
Iliotibial (IT) band/tract: This structure is a mix of a ligament and tendon. It functions as a tendon for the hip abductor muscles and as a ligament connecting the pelvis and tibia. Since your knee kit stops at the middle of the femur, find a ligament originating from a cross section plate and connecting to the tibia.
The tendons
Tendons connect muscle to bone. Like ligaments, these are represented in your knee kit by ropes or straps that stretch minimally when pulled on.
Quadriceps tendons: These tendons connect the four ("quad") anterior thigh muscles to the patella.
Rectus femoris tendon: This tendon is the most central and anterior of the quadriceps tendons.
Vastus lateralis tendon: This is the most lateral of the quadriceps tendons.
Vastus medialis tendon: This is the most medial of the quadriceps tendons.
Vastus intermedius tendon: This tendon is directly posterior to the rectus femoris tendon.
Finish labeling your kit (Optional)
If you attached circle stickers to your kit in Premarking the hunt items, now test how well you can identify these structures on your kit.
On each circle sticker that you attached to your kit, write in the number corresponding to that structure from the word bank on page 1 of the activity worksheet. For example, you’d write "1" on the sticker that you have attached to the Adductor tubercle.
If you get stuck, refer to pages 2-4 of the activity worksheet that you completed; but try to avoid this as much as possible.
Once you've finished labeling all of the stickers, check your work against pages 2-4 of the activity worksheet and then remove the stickers to prepare your kit for another activity or for someone else to use.
References cited
The following articles/books are references cited in this activity:
- Smith, Laura K et al. Brunnstrom’s Clinical Kinesiology. 5th ed. / revised by Laura K. Smith, Elizabeth Lawrence Weiss, L. Don Lehmkuhl. Philadelphia: F.A. Davis, 1996. Print. Chapter 9: Knee Region. https://catalog.nlm.nih.gov/permalink/01NLM_INST/vdtut1/alma997938033406676.
Any 3D renderings or animations in this activity were created using Blender.
All anatomical data used to make the kit and activities are from:
- National Library of Medicine. (1995–). The Visible Human Project [Digital Data Set]. Bethesda, MD: National Institutes of Health.https://www.nlm.nih.gov/research/visible/visible_human.html.